
How to deploy a Godot 4 game to Github Pages
Here’s a quick guide to publishing an HTML web build of your Godot game directly from the source code hosted in a Github repository!
Before you get too far into it, just be aware that your GitHub repository needs to be public, and that the games do not seem to load on mobile, but I’m not yet sure if that’s because of Github Pages, something in my build setup, or Godot itself. (I’ll update here if I can find a fix, or shoot me a message if you find one!)
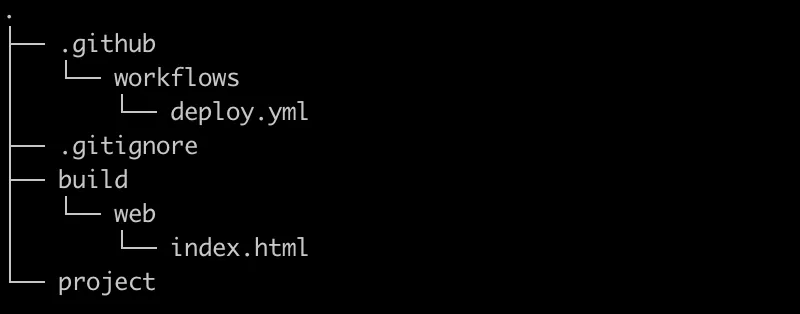
First you will need to organize your project directory. Here’s the end result we’re shooting for.
-
Create your root directory and name it whatever you like. Initialize your git repository here.
-
Create a subdirectory named
build, and within it a subdirectoryweb. Create anindex.htmlfile withinweb. -
Go back to your root directory and create a new subdirectory
project. -
If you already have a Godot project, simply move all of the project files into the project directory. If not, create your Godot project in the
projectfolder, with the git option disabled (since you are initializing git yourself in a directory above). -
In the root directory, create a
.gitignorefile and add .godot/ to it. -
In the root directory, create a subdirectory
.githuband within that a subdirectoryworkflows. -
In
workflowscreate a file calleddeploy.ymland add the configuration. The only change you need to make is make sure the name of the branch on line 10 matches your repository branch name (usually main). On line 4 and 19, Godot’s version is specified (4.1.2). Make sure those lines match your version. Double check your Godot version by clicking on Godot’s ‘about’ menu. -
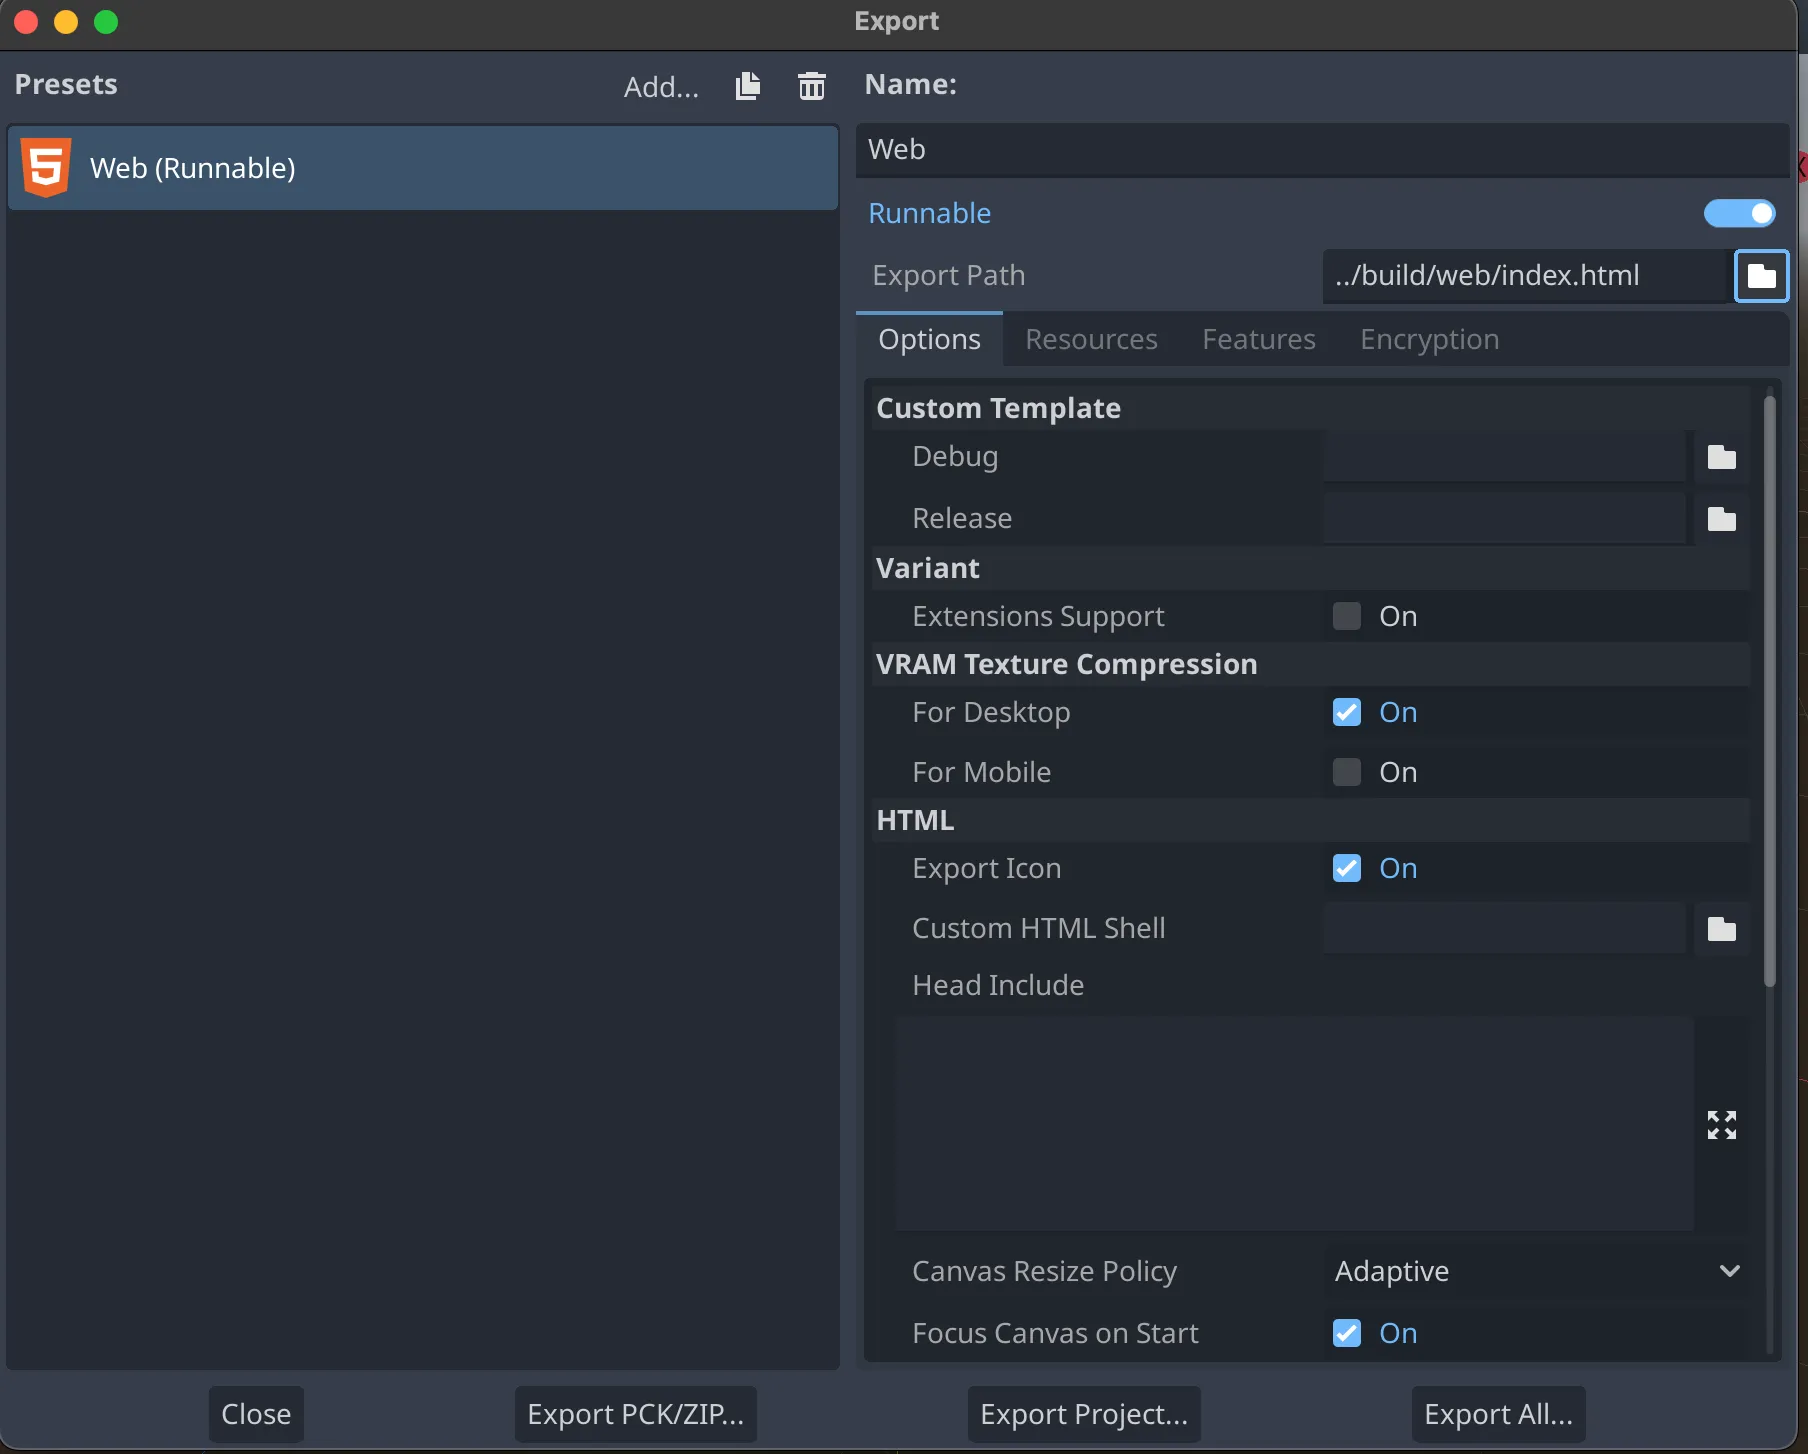
Open your Godot project and configure it to export HTML builds. In Godot’s top menu go to project > export… Add a Web preset. You may get a popup or warning prompting you to make some installations first. Go ahead and do that, and then add the Web preset. You only need to set the export path now by clicking on the folder icon and navigating back up one directory and down into build > web > select the index.html and hit save. You can now close the export window. Everything is good to go in Godot.
-
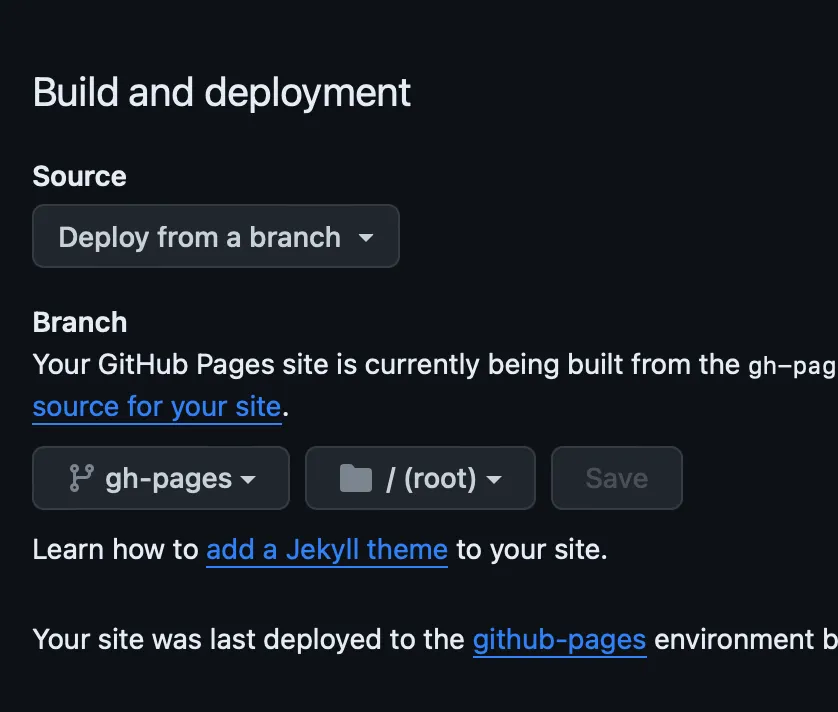
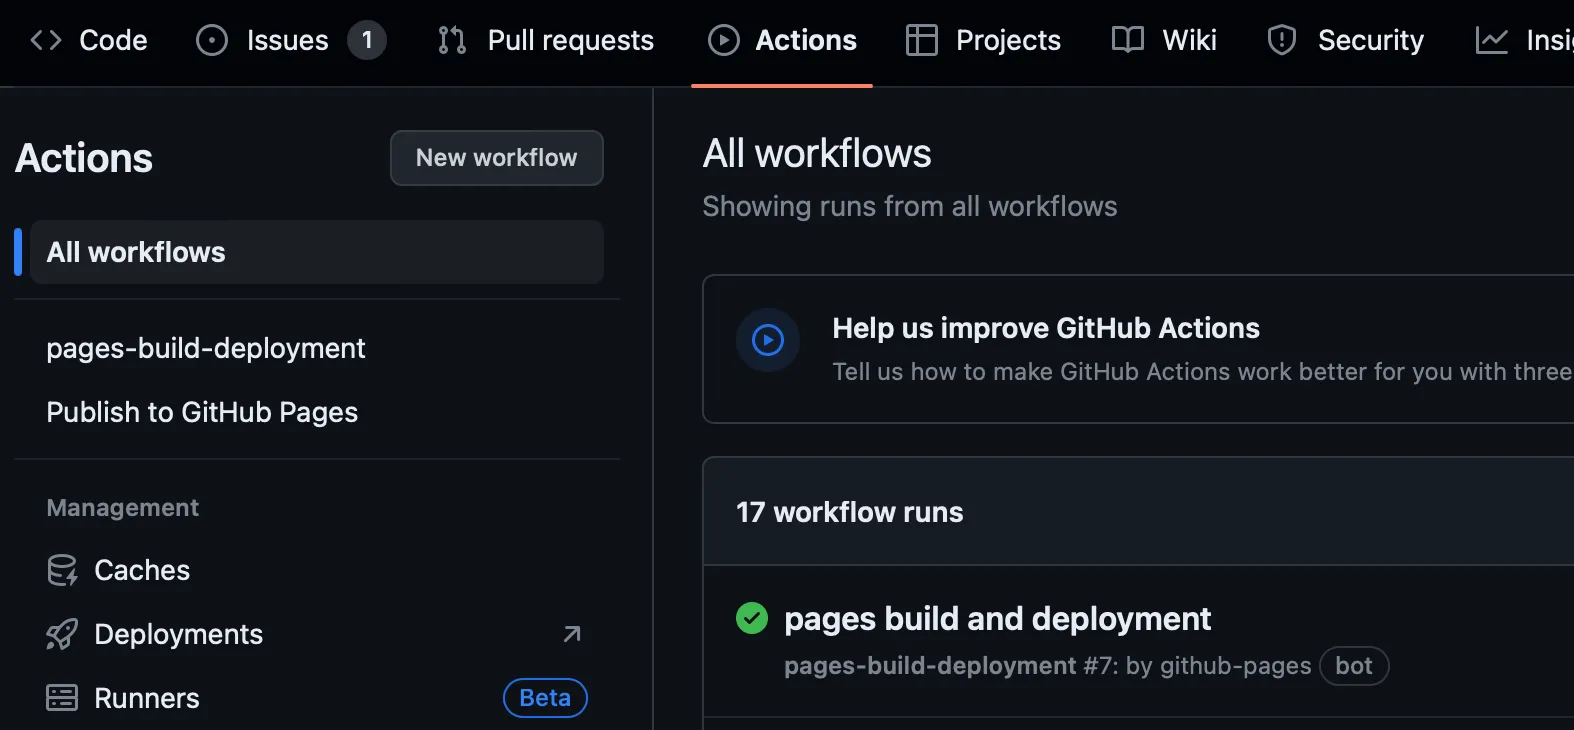
When you push your repository to Github, it should automatically add the workflow you configured in workflows, and you will be able to view it’s process in the ‘Actions’ tab. When the actions finish, go to the repository’s ‘Settings’ > Github Pages and choose deploy from branch. You will not select main, but the gh-pages branch that will be created automatically by the workflow.
-
You may need to rerun the workflow. Go to the ‘Actions’ tab and click the three dots to rerun workflow. Assuming everything completes successfully, it will still take a few minutes, but then you should be able to visit your game from the link that you can find on the Settings > Github Pages tab of your repository!
Problems and Debugging:
-
Make sure that when you push everything to Github, the
export_presets.cfgis in theprojectdirectory (do not add this file to.gitignore). -
Make sure that you have an
index.htmlfile inbuild/web/index.html. If you don’t, create it and double check that your Godot export path is properly set up to point to that file.
I want to give credit to Paul Getwicki who created the original workflow and a video tutorial, go check it out if you want to see some of the steps done (there may be slight differences in the process since it was made for Godot 3). I will post an updated YouTube guide soon and update this article.